Selecting the ‘Update Receipt’ tab automatically re-analyzes the project using the existing footprint and generates a new version of the receipt. See Updating Receipts for more information.
Step 1. From the Project Page, select 'Update Receipt'
Step 2. An informational message will appear

Step 3. To run the analysis, click on the 'Submit for Pre-Analysis' button
You may be required to answer questions depending on the results of the analysis.
Step 4. Click on the 'Submit' button to generate a new version of the Receipt.
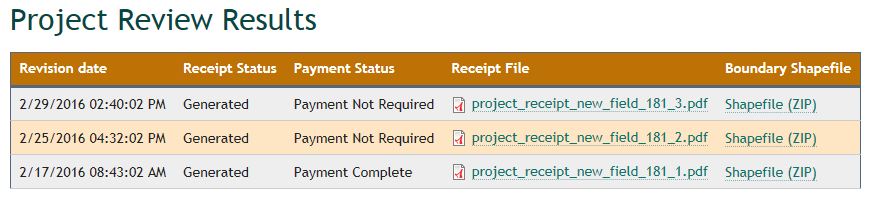
You will receive an email notification when the receipt is generated. The new receipt will appear at the top of the Projects Review Results table. In the example below, note the “_3” at the end of the new receipts file name, indicating this is the third version of the draft receipt.